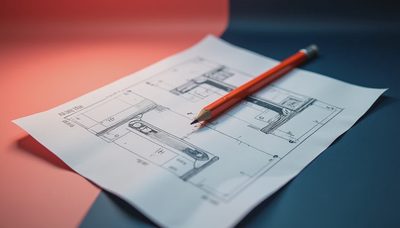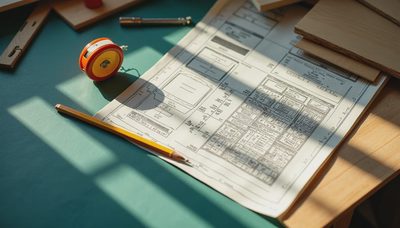


The best diy standing desk plans start with an honest question: how will you work at this surface for eight hours? A desktop that looks clever in a photo can wobble, pinch cables, or leave your wrists at the wrong angle. I have built three versions of my own desk, and the reliable formula is straightforward: choose the right height, control the span, and spend money on hardware where movement or weight is involved.
Start with the working dimensions
Most seated desks land around 28 to 30 inches high, but a standing surface is usually closer to 40 to 48 inches. Your correct height depends on your body, shoes, and keyboard position. Stand with your elbows at roughly 90 degrees and measure from the floor to your hands. Subtract about 1 inch if your keyboard sits directly on the desktop. That number is your starting point, not a universal rule.
For a single monitor and laptop, a 48-by-24-inch top is a practical minimum. A 60-by-30-inch top gives you room for speakers, a notebook, and a monitor arm without forcing everything into one crowded row. In diy standing desk plans, the 24-inch depth is often overlooked. It is enough for most screens, but 30 inches provides better viewing distance and leaves space for a shallow shelf or desk mat.
Measure the room before buying lumber. A 10-by-11-foot office can comfortably take a 60-inch desk against one wall, while a corner setup may need a 48-inch top to preserve a 30-inch walkway. Mark the footprint with painter's tape for a day. This catches door-swing and filing-cabinet problems before you cut anything.

Pick a structure that will not wobble
The cheapest diy standing desk plans often use two filing cabinets with a top across them. That approach can work, but the cabinets need to be similar in height, and the top should overlap each side by no more than 6 to 10 inches. Too much overhang turns the desktop into a lever. A 60-inch top supported 48 inches apart can flex noticeably when you lean on one corner.
For a cleaner build, use a steel frame or four-leg base with a stretcher. A stretcher is the horizontal member connecting legs; it keeps the frame from racking sideways. For a wood base, 2-by-4 legs joined with half-lap joints are stronger than butt joints held by a few screws. A half-lap removes part of each piece so the surfaces overlap, creating more contact area and a flatter connection.
If you use adjustable metal legs, look for a broad foot, a crossbar, and stated load capacity of at least 150 pounds. The desktop, monitor arms, computer, and your leaning weight add up quickly. Many inexpensive electric bases are adequate for a single monitor, but I would not put a 72-inch solid-wood top on a narrow two-leg frame unless the manufacturer specifically supports that span.
Choose the desktop material carefully
For diy standing desk plans, a glued pine panel costs less than hardwood and is easy to cut, but it needs protection from dents and moisture. A 1-inch-thick top is acceptable at 48 inches wide when the supports are close together. At 60 inches or more, 1 1/4 inches gives a more substantial feel and reduces sag. A plywood top with hardwood edge banding is another sensible choice: stable, strong, and easier to keep flat than a wide solid board.
Avoid using a hollow-core door unless you understand where its internal rails are located. It can make a light desktop, but screws placed in the wrong area have little material to grip. If you choose one, attach cleats or mounting plates at the solid ends and use washers so the hardware does not pull through.
Sand the top through 120 and 180 grit, then apply three thin coats of water-based polyurethane or a hard-wax oil. Thin coats cure more evenly than one heavy coat. Round the front edge slightly with sandpaper or a small router bit; a sharp edge becomes uncomfortable against your forearms by midafternoon.
Build for cables, monitors, and movement
A standing desk is not finished when the top is attached. Drill a 2-inch cable grommet near the rear corner, leaving enough clearance for a monitor arm clamp. Mount a surge protector underneath with screws or industrial hook-and-loop tape, and run one power cord toward the wall. Do not create a tight loop that catches your feet when the desk rises.
This is where diy standing desk plans should include a movement test. Set the monitor at eye level, type for five minutes, and deliberately press down on each front corner. If the image shakes or the frame walks across the floor, add a rear stretcher, wider feet, or a wall safety tether. A monitor arm magnifies vibration because it places the screen farther from the frame.
For a fixed-height desk, consider a 42-inch or 48-inch top rather than trying to serve every user. For a shared office, an electric frame is usually worth the additional $250 to $500 because it lets each person set a usable sitting and standing position. A manual crank frame costs less and can be durable, but frequent adjustments become irritating if the mechanism requires many turns.

Budget the build like a product, not a weekend project
A basic fixed desk can cost $120 to $250: about $50 to $100 for a top, $40 to $90 for legs or cabinets, and the remainder for fasteners, finish, and cable management. A sturdy electric version commonly lands between $450 and $900. The frame is the place to avoid false savings. Replacing a sagging desktop is manageable; replacing a noisy or failing lifting column is not.
DIY standing desk plans should also account for tools. If you need a circular saw, drill, clamps, sander, and pocket-hole jig, a borrowed tool or local makerspace can keep the first build affordable. Buy a straightedge and a good 2 1/2-inch driver bit before buying decorative hardware. Accurate cuts and tight fasteners matter more than black brackets.
Compare the total with a ready-made option from IKEA, Uplift, FlexiSpot, or Fully-style used office furniture. A flat-pack desk may win when your time is worth more than the savings, especially if it includes a warranty and cable tray. Building makes more sense when you need an unusual width, a specific wood finish, or a base that fits a narrow corner.
A practical build sequence
The safest diy standing desk plans follow a measured sequence. First, tape the footprint and confirm the standing height. Second, cut or order the desktop, then let solid wood acclimate indoors for several days before finishing. Third, assemble the base on a flat floor and check it for square by comparing diagonal measurements. If both diagonals match closely, the frame is likely square.
Fourth, install the desktop with slotted brackets or oversized holes where needed. Wood expands across its width, so rigidly trapping a wide panel can cause cracking. Fifth, attach cable hardware and test the desk empty. Finally, load the monitor, computer, speakers, and accessories one at a time while checking for flex and noise.
Do not skip the floor check. Uneven flooring is common in older homes, including many Charlotte ranch houses. Adjustable feet or thin furniture shims can remove a surprising amount of movement. Secure a tall monitor or heavy arm before raising an electric desk, and keep the lifting path clear of drawers, radiators, and chair arms.
Common mistakes worth avoiding
The first mistake is setting the desk too high because standing feels better at first. After an hour, raised shoulders and bent wrists tell you the surface needs to come down. The second is choosing a top that is too shallow for the monitor. If your display sits 18 inches from your face, increase depth or move the screen with an arm.
The third mistake in diy standing desk plans is treating stability as a cosmetic issue. A desk that rocks during typing creates constant small corrections in your shoulders and hands. Add structure before adding accessories. The fourth is forgetting a sitting option. A quality anti-fatigue mat helps while standing, but it does not replace a supportive chair or a sit-stand routine.
Build the simplest version that fits your room, work, and budget. If a fixed top solves the problem for $200, there is no prize for installing motors. If two people share the station, spend on adjustability and a stable frame. Good furniture is not defined by how complicated it looks; it is defined by whether the dimensions, materials, and connections keep working after the novelty wears off.