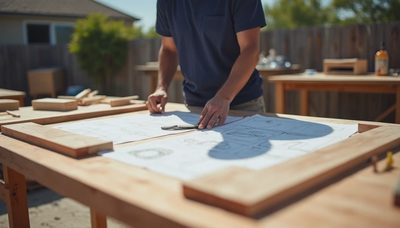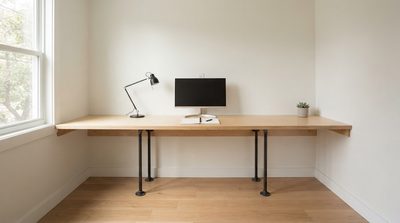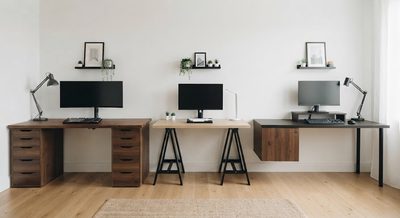

The best diy computer desk plans begin with the work, not the shape. Before cutting a single board, decide whether the desk will support two monitors, a gaming tower, handwritten notes, or eight hours of video calls. I have built desks that looked excellent in the garage and failed within a year because the top sagged, the legroom was cramped, or the cable routing was treated as an afterthought. A functional desk is a small piece of engineered furniture: its dimensions, joints, hardware, and finish all need to agree.
Start with dimensions that match your equipment
For most remote workers, a 60-inch-wide by 30-inch-deep desktop is the useful middle ground. It gives two 24-inch monitors room to sit side by side while leaving space for a keyboard, notebook, and a small lamp. If you use one laptop and a single display, 48 by 24 inches can work, especially in a bedroom corner or shared office. I would not go below 23 inches of depth for a primary workstation; the screen ends up too close to your face, and the rear edge becomes difficult to organize.
Set the finished desktop height between 28 and 30 inches. A fixed 29-inch height suits many adults, but your chair and keyboard position matter more than a standard number. Sit with your elbows near 90 degrees and measure from the floor to the underside of your forearm. Leave at least 24 inches of clear width for your knees and 27 inches of clear height. A center drawer, support rail, or file cabinet that steals those inches will become irritating every day.
Measure the room before choosing a top. In a 10-by-11-foot office, a 60-inch desk on the short wall leaves enough clearance for a chair and walking path. For a corner setup, two 48-inch sections can create an L-shaped workstation, but reserve at least 36 inches at the inside corner for turning and cable access.
Choose materials for stiffness, not just appearance
Many diy computer desk plans call for a solid wood slab because it photographs well. Solid wood can be excellent, but wide boards expand and contract with seasonal humidity. In Charlotte, where damp summers are normal, a 60-inch glued-up pine top may move more than a beginner expects. Use elongated screw holes or figure-eight fasteners so the top can shift slightly without splitting.
For a first build, 3/4-inch birch plywood with a hardwood edge is often the smarter purchase. Plywood has alternating grain layers that resist warping, and its flat surface is easy to seal or paint. Add a 1-by-2-inch hardwood apron under the front and back edges, or use a steel frame, to reduce flex. A 1-inch top is adequate for standard monitors; a 1 1/4-inch top is preferable when you plan to clamp a monitor arm.
Avoid inexpensive particleboard if the desk will carry a heavy desktop computer, speakers, and an arm-mounted screen. Particleboard can perform well in factory furniture when properly supported, but exposed screw holes weaken quickly when repeatedly assembled. If budget matters, a prefinished plywood panel and two sturdy drawer units can cost less than premium solid wood and usually provide better dimensional stability.
Build the base around real loads
A desktop does not need a complicated base. It needs four reliable load paths from the top to the floor. Two side panels made from 3/4-inch plywood create a clean trestle base, while a pair of steel legs provides more knee room. For a 60-inch top, keep the supports about 3 to 5 inches inward from each end. That leaves usable edge space without creating a springy overhang.
Use glue and screws for wood-to-wood joints, but do not rely on pocket screws alone for a long, heavily loaded rail. Pocket screws are angled fasteners that pull boards together; they are useful for positioning, yet a glued dado, dowel, or properly fitted rabbet gives the joint more resistance to racking. Racking is the side-to-side wobble that makes a desk feel cheap. Install a rear stretcher at least 4 inches high, set low enough to preserve legroom, or add a modest back panel.
Before finishing, load the assembled desk with more weight than you expect to use. A practical test is several boxes of books plus your computer tower, left in place overnight. Look for sag, loose screws, and movement when you push diagonally on a corner. Sanding and paint cannot correct a weak structure.
Plan cable management before assembly
Cable management works best when it is designed into the desk. Drill a 2-inch or 2 1/2-inch grommet hole near the rear corner of each monitor position, rather than placing every cord through one crowded opening. A plastic grommet protects cable jackets from sharp wood edges. Mount a six-outlet surge protector beneath the top with short screws, leaving enough slack to unplug equipment without crawling under the desk.
Keep power and data cables separated where practical, then use hook-and-loop ties instead of permanent zip ties. Hook-and-loop wraps are easier to open when you replace a monitor or charger. Route the computer tower either on a ventilated side shelf or on the floor with at least 3 inches of clearance around its intake vents. Do not trap it in a closed cabinet just to make the desk look cleaner.
A cable tray mounted 4 inches below the desktop can hide the power strip while keeping it reachable. That detail is one of the most useful upgrades in diy computer desk plans because it prevents a finished workspace from becoming a nest of cords within a week.
Adapt the design to a small or shared room
A dedicated office is convenient, but it is not required. In a 7-by-9-foot guest room, a 48-by-24-inch desk against the wall can leave a 30-inch passage beside the bed. For a living-room workstation, use a 42-inch-wide top with a shallow 20-inch depth and a rear cable trough. That size supports a laptop and monitor without turning the room into a permanent office.
Closet offices need ventilation and lighting more than decorative shelving. Remove the doors only if the opening is wide enough for comfortable shoulder clearance, then mount a 24-inch-deep top between side cleats. Keep the chair outside the closet when the desk is not in use. For a shared space, consider folding legs or a wall-mounted top, but use heavy-duty brackets rated above the expected load and anchor them into studs, not drywall alone.
If two people share one room, separate screens by at least 24 inches and give each person an independently adjustable task light. A beautiful long desk that forces both workers into one fixed monitor height will cause more frustration than a plain pair of smaller stations.
Budget the build and finish it properly
A simple plywood desk can land around $150 to $300, depending on the top, legs, finish, and hardware. Solid hardwood, premium metal legs, and monitor accessories can push the project above $500. Price the fasteners, finish, cable tray, and leveling feet before comparing the result with an IKEA tabletop or a ready-made frame. The cheaper option is often the sensible one when it already provides a flat top and stable base.
For the finish, sand through 120 and 180 grit, ease every exposed edge, and apply two or three thin coats of water-based polyurethane. A slightly softened front edge is more comfortable against your wrists than a sharp square edge. Let the finish cure fully before installing electronics; dry to the touch does not always mean hard enough for clamps and heavy equipment.
The strongest diy computer desk plans are not the most elaborate. They specify a top that stays flat, a base that does not rack, enough clearance for your legs, and an electrical layout you can service. Draw the desk at full size on cardboard or masking tape first. If your chair, knees, monitor, and cable paths fit that outline, the build is ready for the shop.