

The best diy corner desk plans begin with the way you work, not with a picture of a handsome desk on Pinterest. A corner workstation needs to hold your monitor, keyboard, paperwork, and daily clutter without turning the room into an obstacle course. I have built three corner desks in my own office, and the failures taught me more than the successful versions. The right depth, support structure, and cable path matter far more than decorative trim.
Start with the corner and your workflow
Before buying lumber, measure both walls from the corner outward. Record the usable length, baseboard thickness, window trim, outlet locations, and the swing of the door. In a 10-by-11-foot office, an L-shaped surface with a 60-inch main run and a 48-inch return usually leaves enough circulation space for an office chair. Keep at least 30 inches clear in front of the seated position; 36 inches feels much better when you need to stand, stretch, or roll toward a filing cabinet.
The working surface should generally be 28 to 30 inches deep. Twenty-four inches looks efficient on paper, but it pushes a monitor too close and leaves no room for a notebook beside the keyboard. A 30-inch depth gives you a practical viewing distance while preserving a usable writing area. If one side is mainly for a laptop or printer, that return can be 24 to 26 inches deep and still perform well.
Draw the footprint on the floor with painter's tape. Put your chair inside the outline and mimic reaching for a light switch, outlet, or storage bin. This simple test catches problems that a sketch misses, including a return that blocks a closet or a corner that makes your knees hit a cabinet.

Three construction approaches worth considering
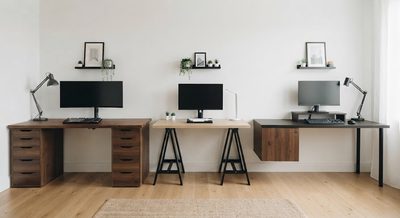
The simplest diy corner desk plans use a continuous top supported by two drawer units and a pair of wall cleats. A cleat is a firmly attached strip of wood that carries part of the desk's weight. Two IKEA Alex-style drawer units can provide convenient storage, although their exact dimensions and price change over time. Add a 1-inch-thick butcher-block panel or laminated plywood top, and you have a strong setup without building every cabinet from scratch.
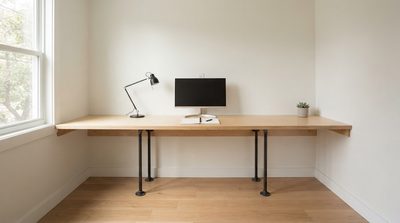
A wall-mounted design creates the cleanest legroom. Install hardwood or construction-grade plywood cleats along the back and side walls, then add one front support leg or a steel bracket near the outside corner of each run. This works well in a small room because the floor remains open for a task chair and a small wastebasket. The tradeoff is installation: studs, fasteners, and careful leveling are not optional.
The third option is a fully built L-shaped frame. Use 2-by-4 framing beneath a plywood top, then cover the edge with hardwood banding. This is the most affordable route when you already own a saw and drill, but it creates a heavier piece that is difficult to move. For a rental or shared room, modular supports are the smarter buy.
Materials: spend money where it prevents problems
For the top, 3/4-inch plywood works when supported every 24 to 30 inches. A 1-inch solid-wood panel resists flexing and gives a more substantial feel, but it can cost $120 to $300 depending on species and length. Pine is inexpensive and easy to work with; maple and oak provide harder surfaces and cleaner edges. I prefer two layers of 3/4-inch plywood for a wide unsupported span, joined with wood glue and screws from underneath.
Avoid relying on a single thin melamine shelf across a long corner. Melamine is a paper or plastic surface bonded to a particleboard core. It is smooth and budget-friendly, but a 60-inch span can sag when loaded with monitors and equipment unless the underside is properly supported. A hardwood front edge, steel rail, or center leg solves that issue.
Use structural screws into wall studs rather than drywall anchors for the main load. Confirm that fasteners are long enough to pass through the cleat and drywall while entering the stud by roughly 1 1/2 inches. Sand exposed edges, seal raw plywood, and let paint or finish cure before installing electronics. That last step prevents sticky surfaces and trapped solvent odor.
Build around the equipment you actually own
Many diy corner desk plans fail because the builder chooses dimensions first and measures equipment later. Write down the width of every monitor, speaker, lamp, dock, and printer. A dual-monitor setup can consume 40 inches before you add speakers or a notebook. A monitor arm also needs a clamp zone, and some arms require 3 to 4 inches of clear space behind the desktop.
For a seated workstation, a 29-inch desktop height is a reasonable starting point, but your chair and body determine the final answer. Sit with your shoulders relaxed and elbows near 90 degrees. If your keyboard is too high, a beautiful desk becomes a daily source of wrist and shoulder strain. A keyboard tray can lower the input surface, although a well-sized fixed desktop is usually sturdier and easier to maintain.
If you want sit-stand capability, do not simply place an electric frame under an oversized L-shaped top. Check the frame's weight rating, maximum width, crossbar position, and corner geometry. A modular two-piece arrangement often works better than forcing one massive top onto a standard rectangular frame.

Cable management is part of the structure
Plan cable routes before attaching the top. Put a 2-inch grommet near the monitor arm, another near the computer, and a removable raceway under the rear edge. A grommet is a finished opening that lets cables pass through without scraping against a raw hole. Leave enough slack for a monitor to move, but do not coil excess cable into a hot, crowded power strip.
Mount the power strip beneath the desk instead of leaving it on the floor. Label the power adapter for each device, and keep the computer's ventilation openings clear. If your corner includes a standing lamp or printer, give each a separate path so one replacement cable does not require dismantling the entire desk.
Common mistakes and a practical build sequence
The most frequent error in diy corner desk plans is treating the corner as dead space. A sharp inside corner can be difficult to reach, so use it for a cable hub, small speaker, or rotating monitor mount rather than daily paperwork. Another mistake is forgetting baseboards. A top pushed tight against the wall may sit 1/2 inch forward, changing the usable depth and the alignment of the return.
Build a cardboard template first, then cut the top only after the template fits. Assemble the supports, level them in both directions, and test the frame with several loaded boxes before applying finish. Install the top with screws through elongated holes or metal brackets so seasonal wood movement does not cause splitting. Finally, sit at the workstation for 20 minutes with your normal keyboard, mouse, and chair. You will find ergonomic problems faster this way than by admiring the empty desk.
What a sensible budget looks like
A basic corner desk can cost $180 to $300 using plywood, simple legs, cleats, finish, and hardware. A midrange version with a butcher-block top and drawer units often lands between $350 and $650. Custom hardwood, premium steel supports, and cable accessories can push the project past $900, which is where a ready-made commercial desk deserves comparison.
The best diy corner desk plans are not necessarily the cheapest. They let you put money into the top, fasteners, and chair clearance while skipping features you will never use. Measure twice, mock up the room, and build the desk around your actual workday. When the surface is stable, the cables disappear, and your chair moves freely, the corner stops being wasted space and becomes the most productive part of the room.